How to give access to your employees via SSO
Advantages
If you already have a website or corporate system where users have accounts, you can connect Single Sign-On (SSO) for logging into IVA 360. This allows users to authenticate in the service without entering their login and password again, using their familiar account. As a result, logging in becomes faster and more convenient, and you always know exactly who is working with the platform, creating events, or has access to your company's products.
How to set up SSO
The setup consists of two stages:
- Setting up Keycloak on your company's side. Where you will need to create a new client for connection in the main realm where users are located.
- Entering settings in the IVA 360 personal account so that we understand where exactly to connect for user authentication via SSO.
Configuration
Stage 1 — Create a new realm and add users (optional)
A new realm needs to be created if you don't have one yet or if you want only a specific list of users to have access to SSO SAML login.
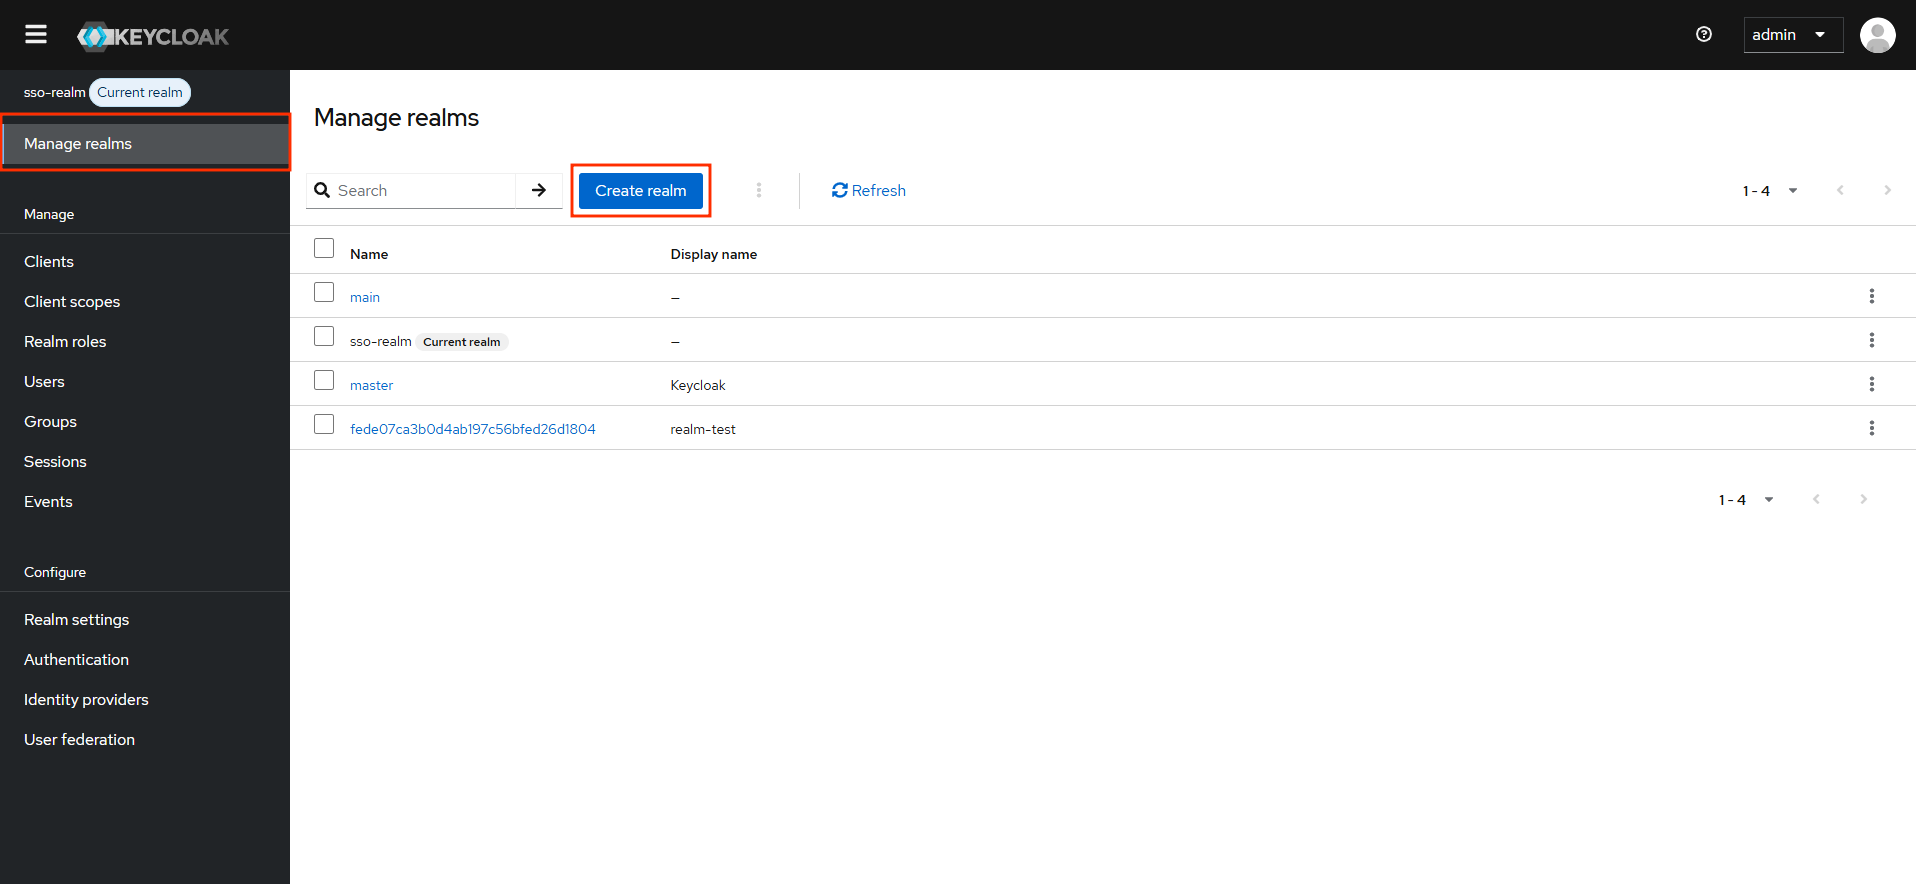
- Create a new realm:
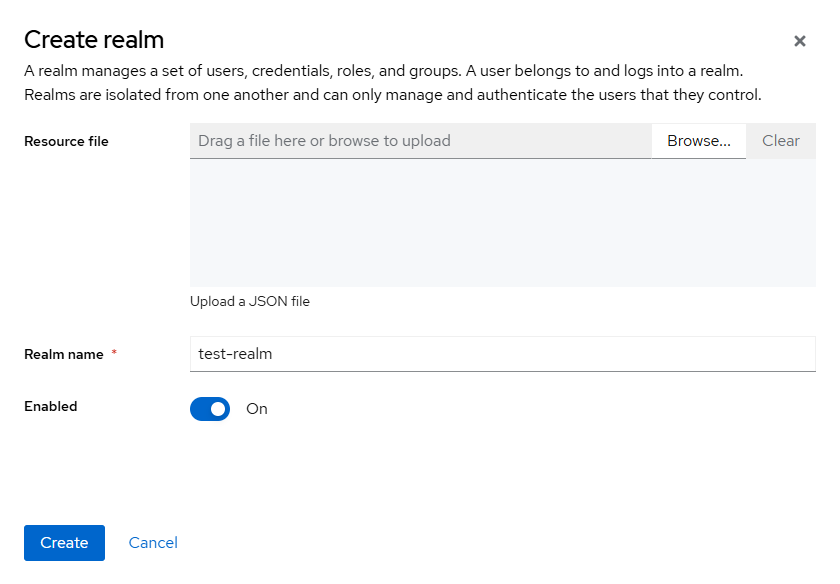
- In the modal window, add the realm name, enable it, and create it:
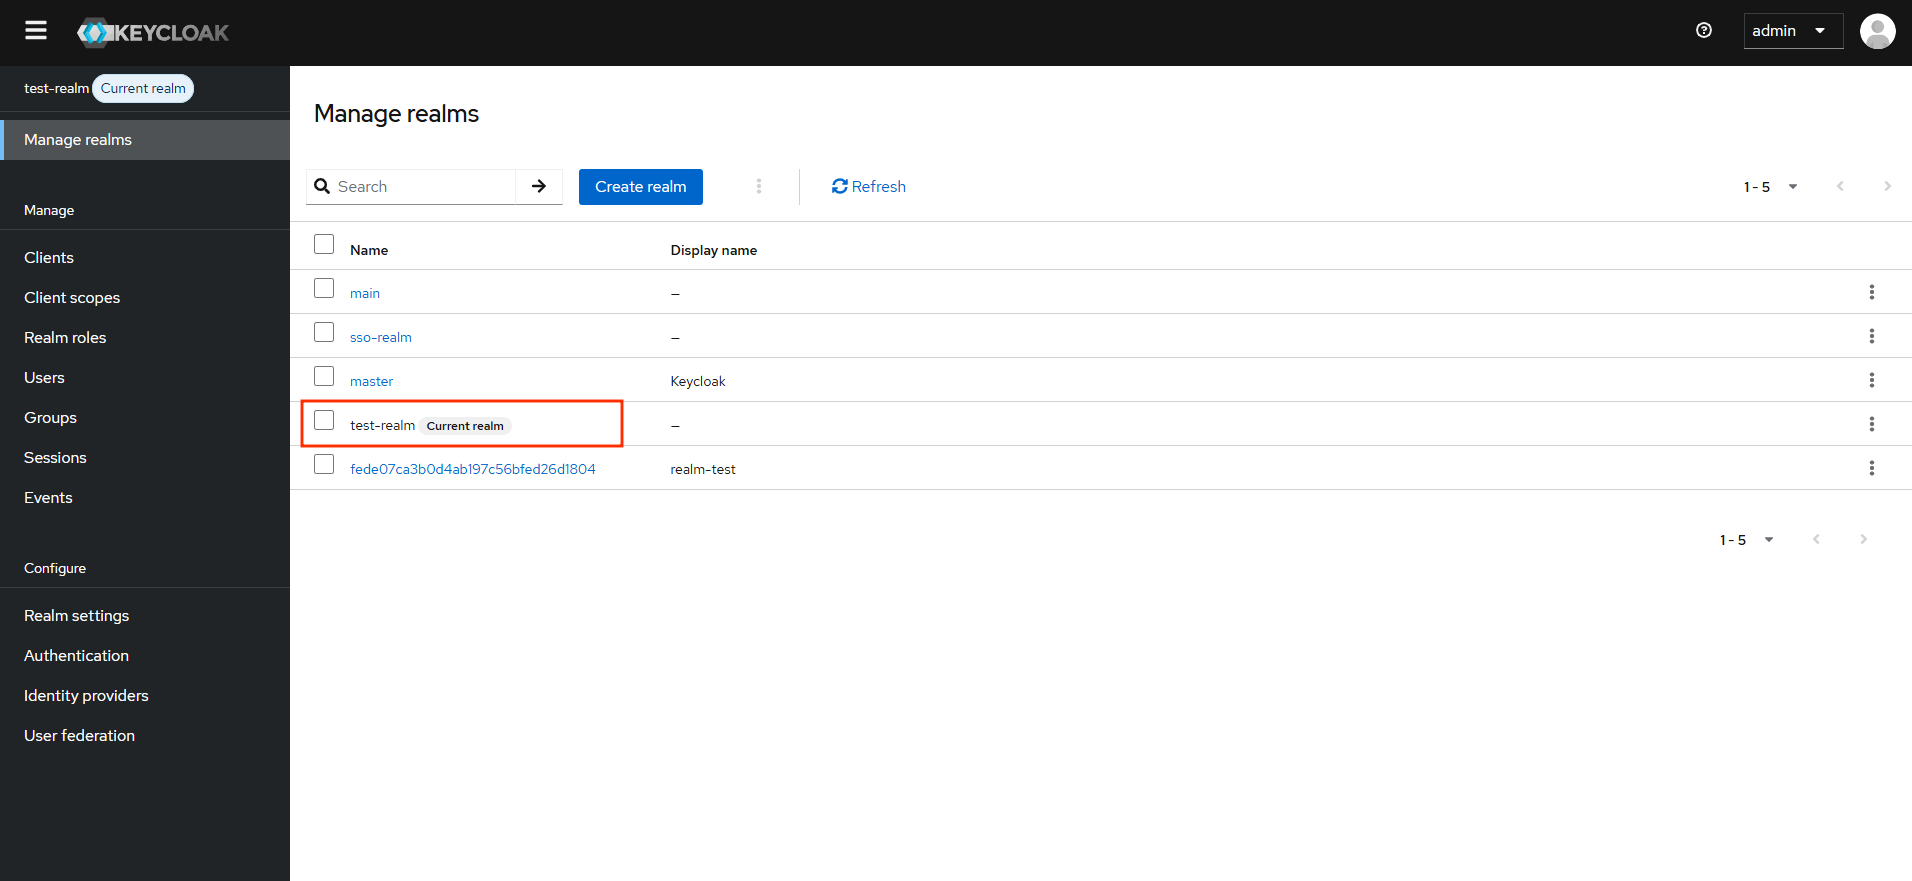
- Realm created
- Create users if they do not exist yet:
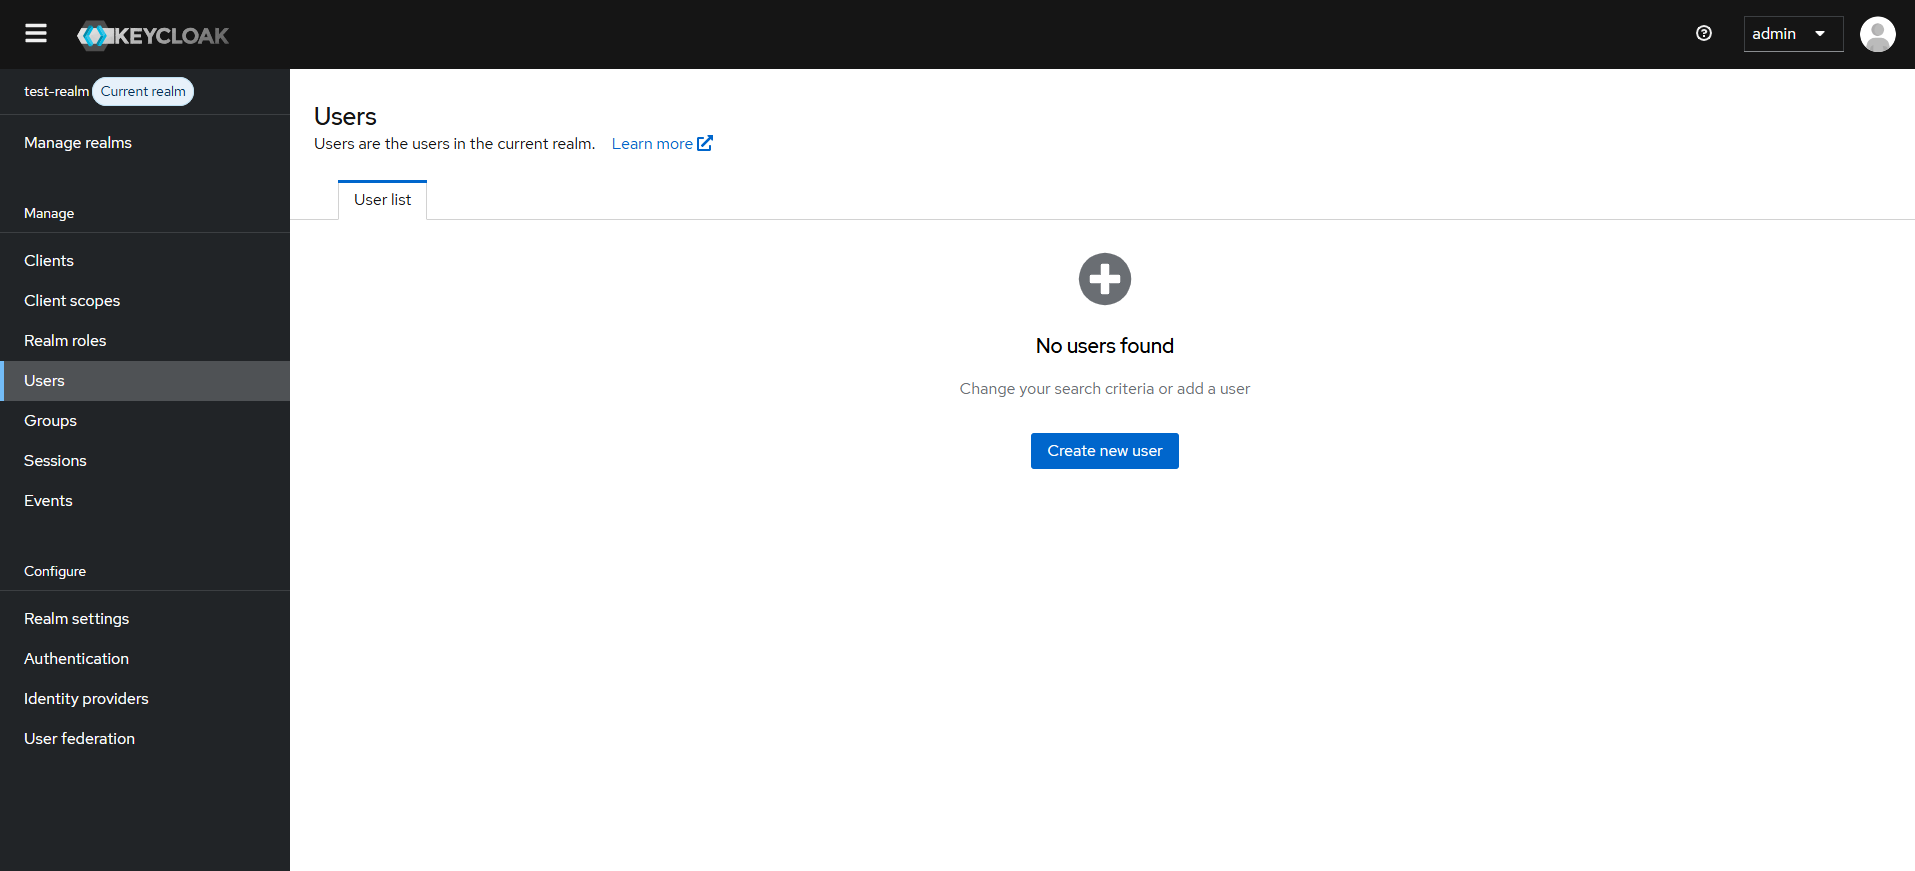
- Add user data and save
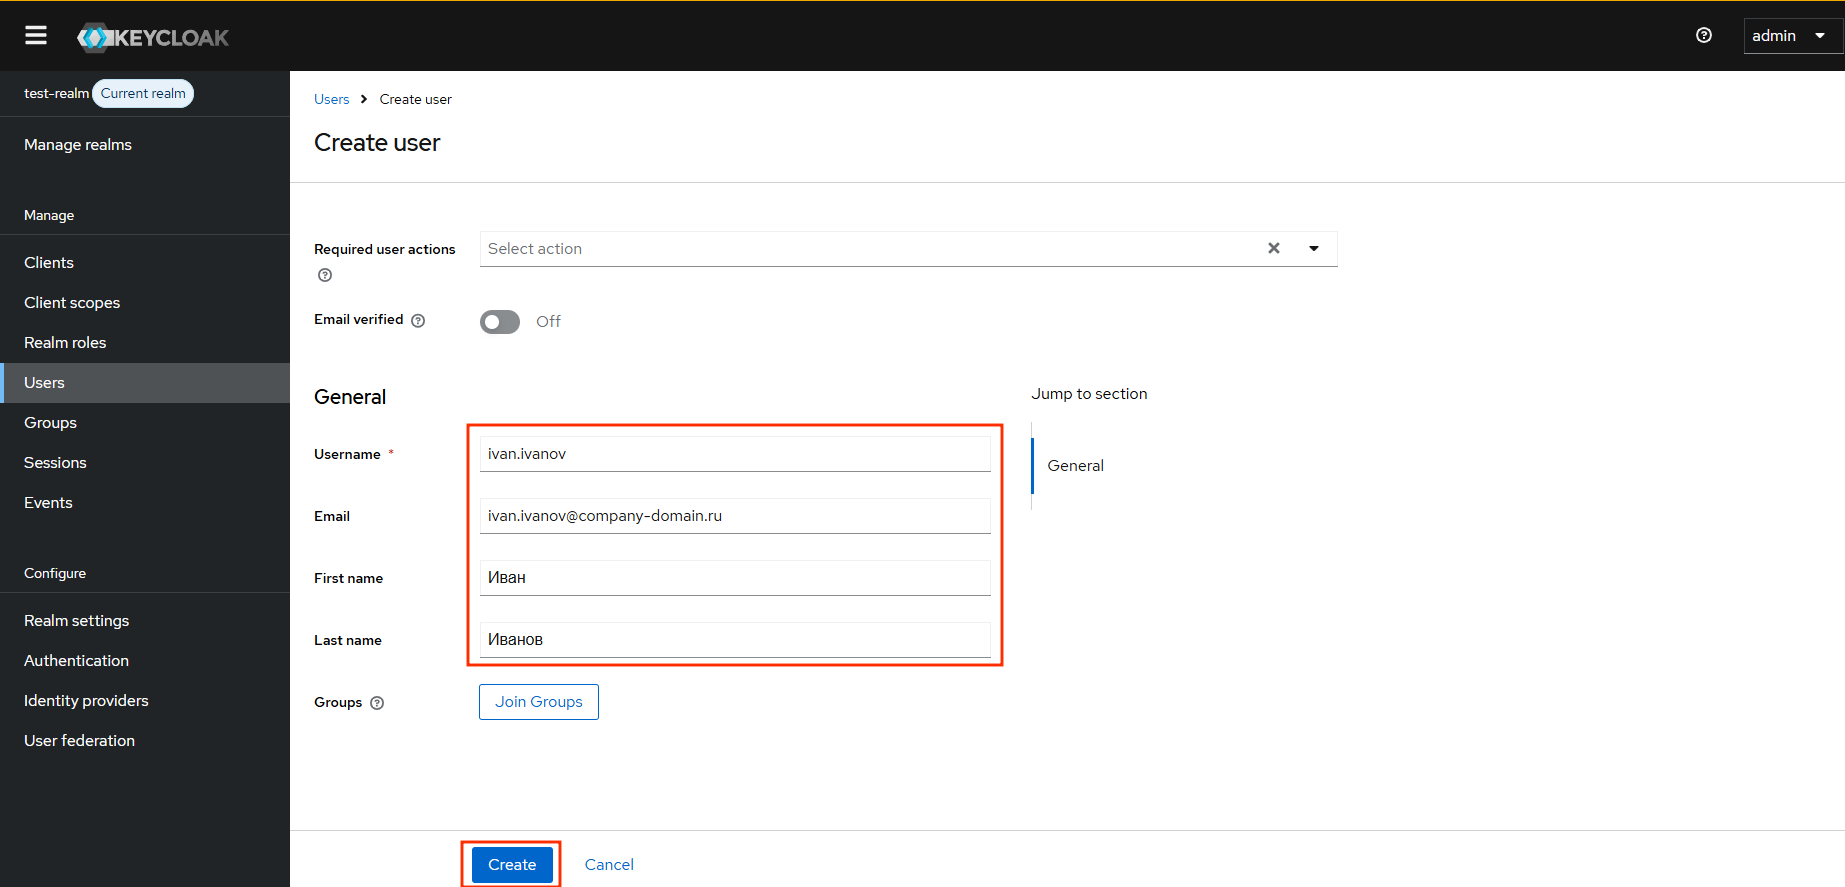
- After saving, you can set a password for the user:
Add a new client in your company's Keycloak
To enable your company's Keycloak to accept authentication requests from IVA 360, you need to create a new client with the source - https://id.iva360.ru/* and configure it
Create a new client
Fill in the new client's data and click next:
Client type: SAML
Client ID: Arbitrary value, which will be added to the SSO IVA 360 settings
Name: Arbitrary value
Always display in UI: On- Fill in the fields for redirects and save
Root URL: https://dev-id.iva360.ru/*
Home URL: https://lk-dev.iva360.ru/*
Valid redirect URIs:
Valid post logout redirect URIs:
Get SAML settings in your company's Keycloak:
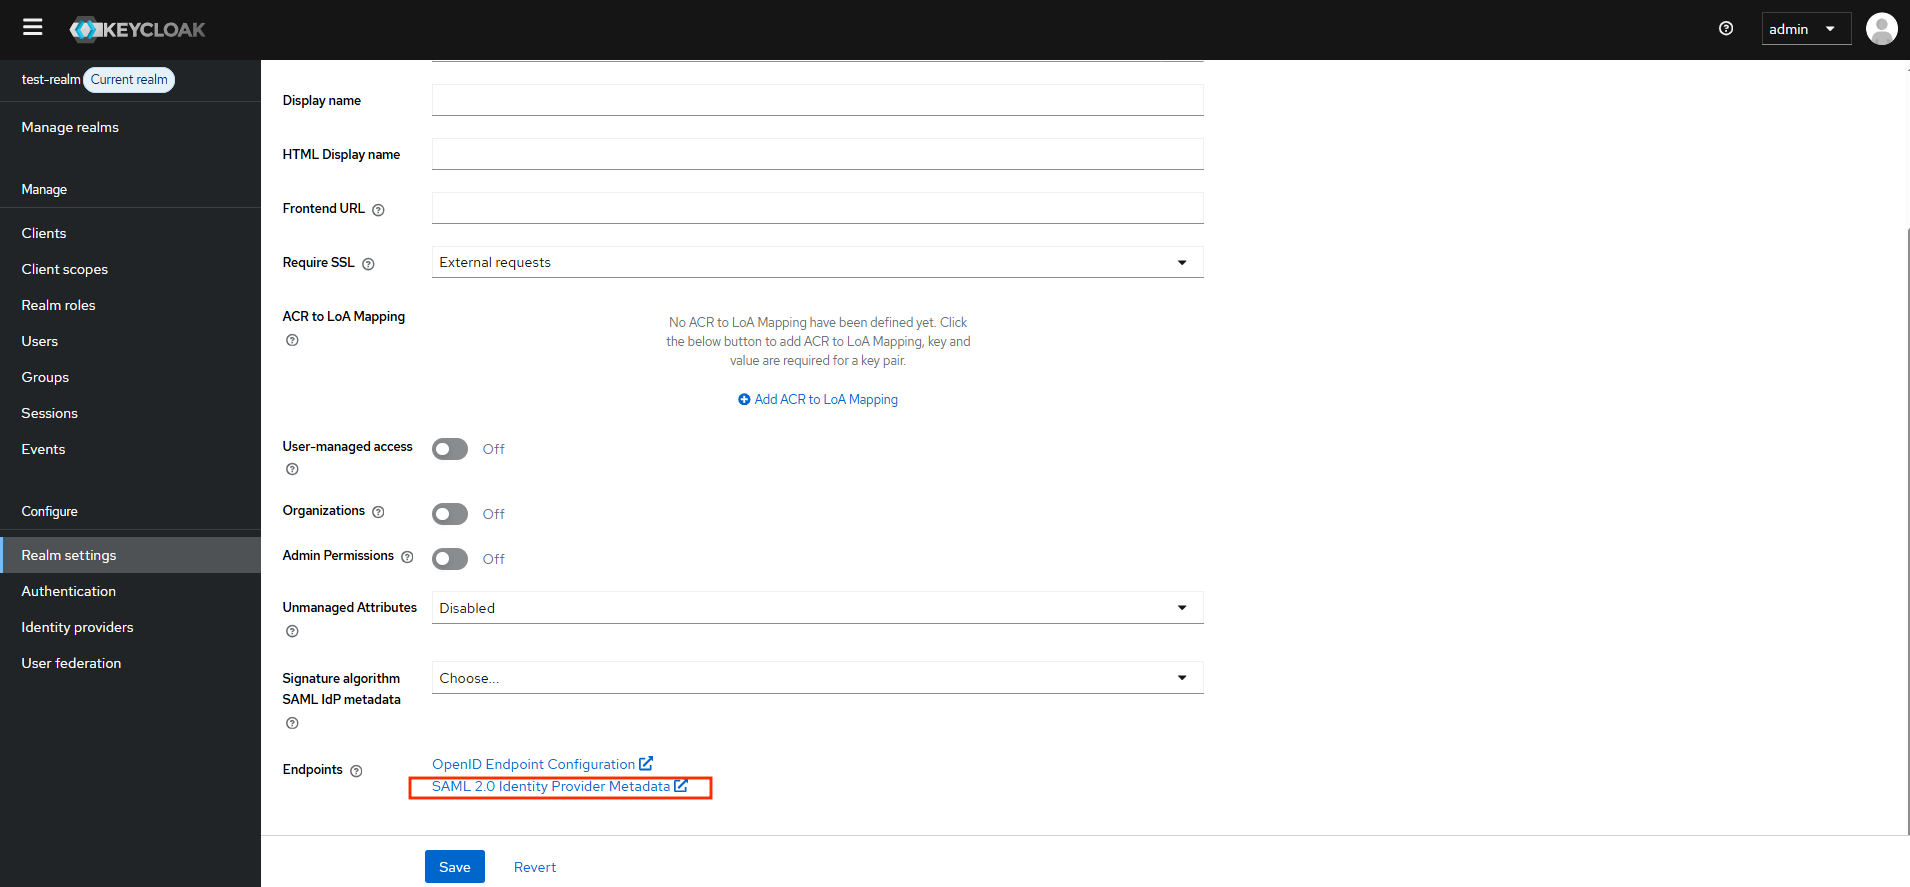
- Go to the bottom of the realm settings page and open "SAML 2.0 Identity Provider Metadata" We will need this data for the SSO IVA 360 settings
Stage 2 — SSO IVA 360 settings
- Log in to your personal account and go to the integrations section https://lk.iva360.ru/integrations
- Add a company if necessary.
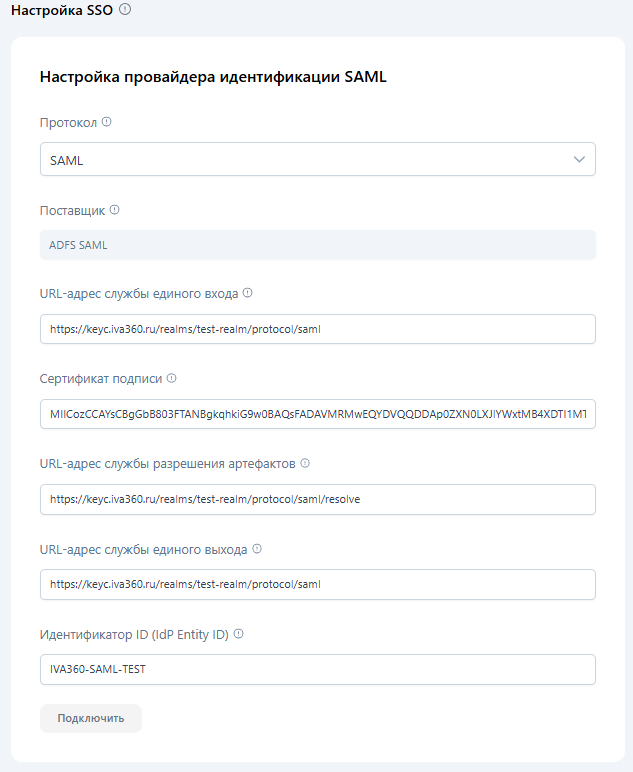
- Go to the SSO tab and select the SAML protocol
- Enter the data and save the settings:
Single Sign-On Service URL: SingleLogoutService from the XML file
Signing Certificate: X509Certificate from the XML file
Artifact Resolution Service URL: ArtifactResolutionService from the XML file
Single Logout Service URL: SingleSignOnService from the XML file
Client ID: Client ID from the "Add a new client" section p. 2